Configure Your Device
Introduction
The Cloud service is supported in NMEA 2000 Wi-Fi Router YDNR-02, NMEA 2000 Wi-Fi Gateway YDWG-02, and NMEA 2000 Ethernet Gateway YDEN-02.
The settings of these devices are very similar; we will show the configuration process below using YDNR-02 as an example. Please, refer to the user manual of your Device for detailed descriptions of settings and initial setup.
To make the Device operate as part of the Yacht Devices Cloud Service, follow the steps below. It is assumed that you have already connected the Device to your boat's network (Wi-Fi or Ethernet) and have access to the administrative website of the Device.
STEP 1. Check network settings
Click the "Firmware Update" link in the left menu of the administrative website
and update your Device to the latest firmware.
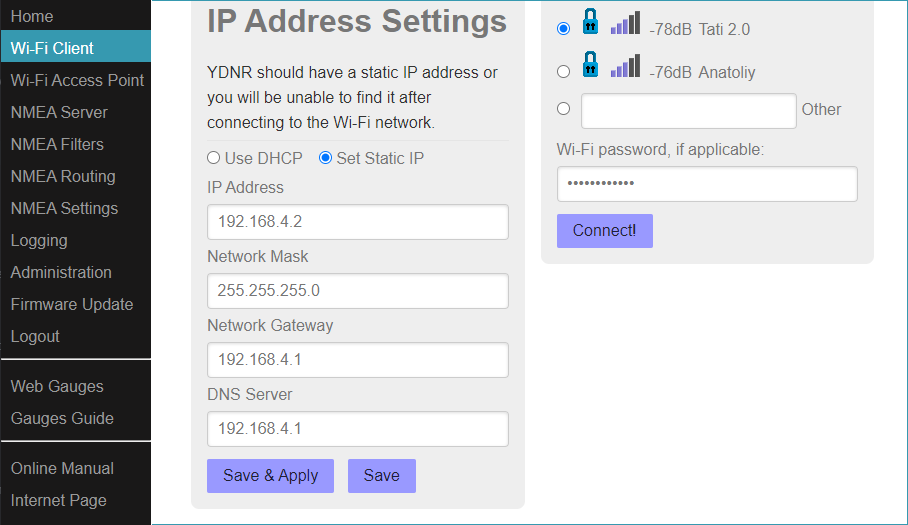
Open the "Wi-Fi Client" link ("Ethernet Settings" in case of YDEN-02) and, if your Device uses a static IP address, be sure that the correct DNS server is specified. In you are using of DHCP server (dynamic IP), the correct DNS server will be provided by the network router along with IP address.
The DNS server is used by the Device to connect with "upload.yachtd.com" server.
STEP 2. Turn on logging
Click the "Logging" link and be sure that logging is turned on (interval is not set to "Off"), the selected data source includes NMEA 2000 (because most data are coming from this interface), and that the selected data set corresponds to your boat.
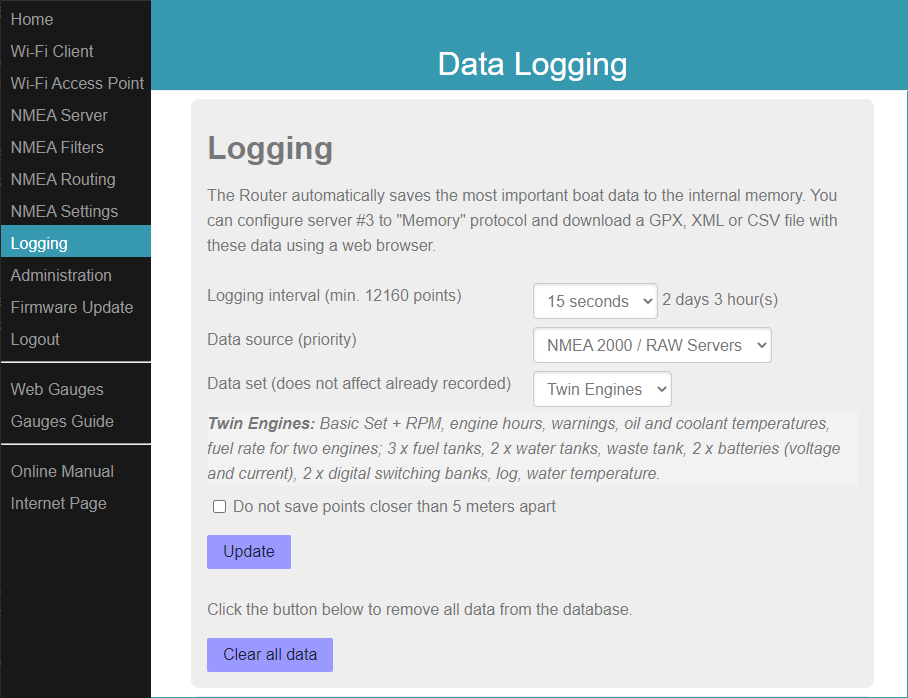
If you monitor your boat at anchor or in a marina, deselect the “Do not save points closer than 5 meters” checkbox, otherwise you will see only the point recorded on arrival.
STEP 3. Be sure that you have data
Scroll down the "Logging" page to "Upload" section. If you just turned on the logging, the status of the last connection will be "Unknown" and the Device will have "no points to upload" (as shown on the screenshot below).

Wait a few minutes (according to the logging interval setting) to allow the Device to record at least two points and refresh the page in web browser. You should get the message that Device has points to upload.
STEP 4. Enter the Boat's Key
You will need the Device's serial number to obtain the key. The serial number is printed on the Device's case and on the "Home" page of the administrative web site. Obtain your boat's key in your Cloud Service account as it described there.
When the boat's key is entered to the Device's settings, new portions of data are uploaded every few minutes (every 2 minutes when 15 seconds logging interval is specified or every 5 minutes in case of other logging interval, the Device must have at least two points to upload).
Wait a few minutes according your settings and check the "Upload" section of the "Logging" page for the updated result of the last connection (you will need to refresh the page manually).
STEP 5. Connection troubleshooting
If the Device can't connect with "upload.yachtd.com", the result of the last connection will not be updated (the Device considers that there is no connection to the Internet). To find the reason, you may check the debug log.
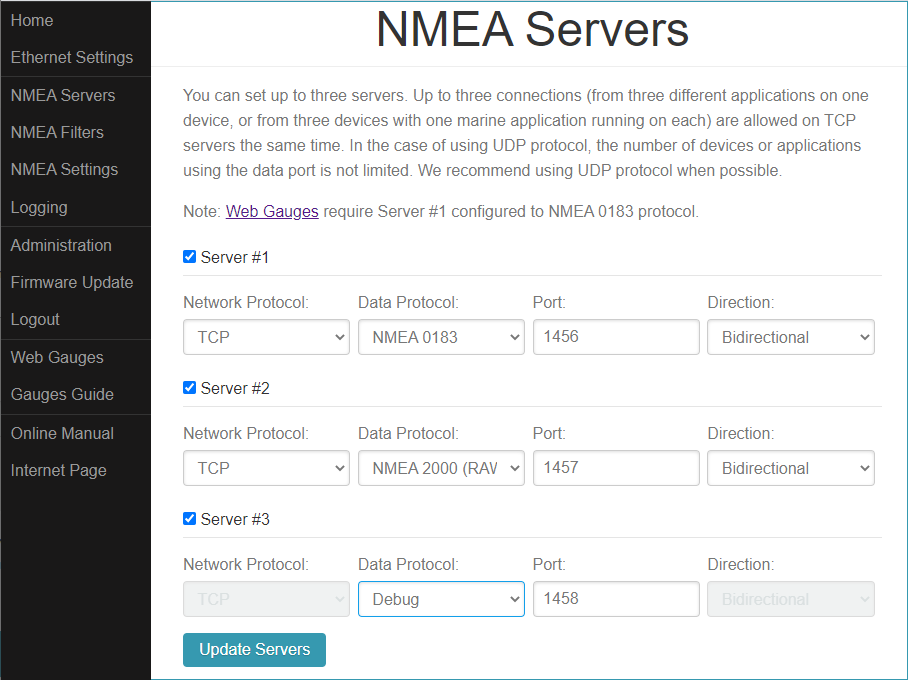
Open the "NMEA Servers" page and configure the Server #3 to "Debug" protocol, as it shown at the screenshot below.
If your administrative web site has the address 192.168.4.1, type "192.168.4.1:1458" (without quotes) in the address bar of the web browser. You may need to wait a few minutes until you see lines starting with "YD CLOUD:" on the screen (there may be a lot of data in the log, use search to find "YD CLOUD" keyword).
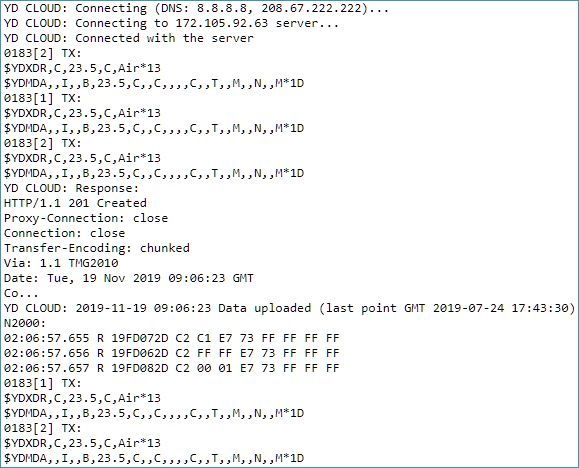
In the first line of the screenshot, we see what DNS servers are used by the Device. The second line means that DNS server returned the IP address of "upload.yachtd.com". The third line means, that connection was successfully established. The first lines of server's response are printed after the "YD CLOUD: Response" line. And the last "YD CLOUD" line contains the result of the connection returned by the server (this line will be displayed in the "Upload" section of the "Logging" page).
You can apply to our technical support and your log data will help us solve your issue faster.
STEP 6. Logging troubleshooting
You can configure the Server #3 to "Memory" protocol (see the first screenshot at the previous step). If your administrative web site has the address 192.168.4.1, type "192.168.4.1:1458" (without quotes) in the address bar of the web browser. The data export page will be opened, and you can export the data stored in the internal memory of the Device to spreadsheet (CSV file) or to GPS track (GPX file). Please, see this article for details.
See Also